Working with a Breadboard
This post is going to be talking about how to work with a Breadboard and how to read the Pi Cobbler.
Breadboard
A breadboard is used to build and test circuits quickly before finalizing any circuit design. The Breadboard has many holes into which components like wires, resistors, pi cobblers can be inserted.
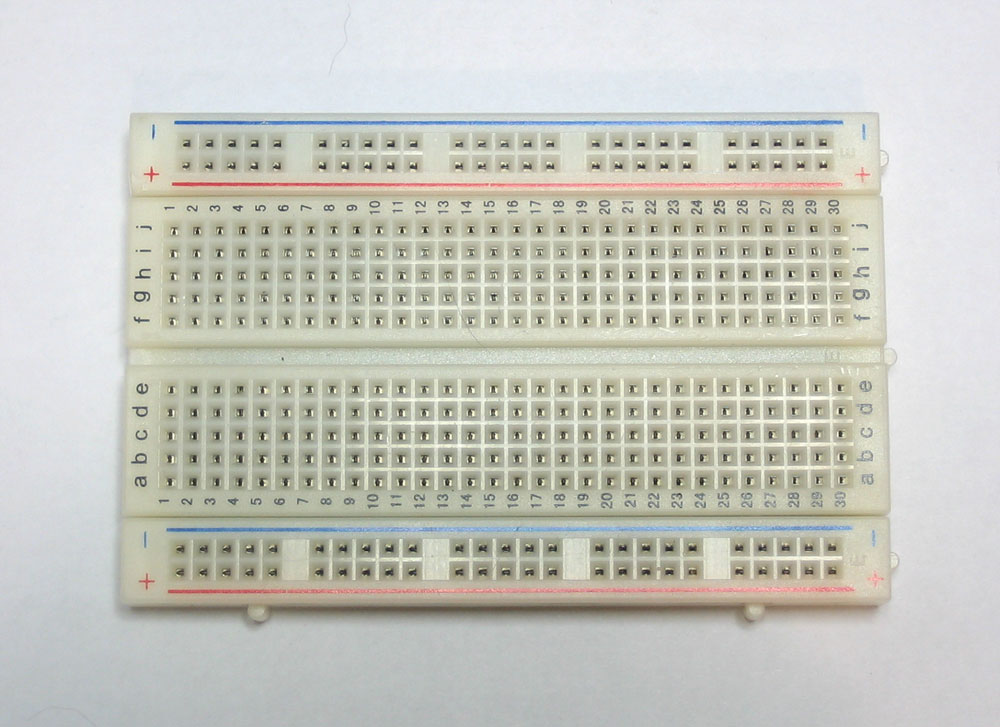
The breadboard that was used for this project is shown below.

Since there are 5 clips on one strip, you can connect up to 5 components. As you can see there are 10 clips on the strip and it is separated by a ravine. The ravine separates the 2 sides and they are no electrically connected. This Site was used to better understand how the breadboard works and it has proven to be very helpful.
Pi Cobbler
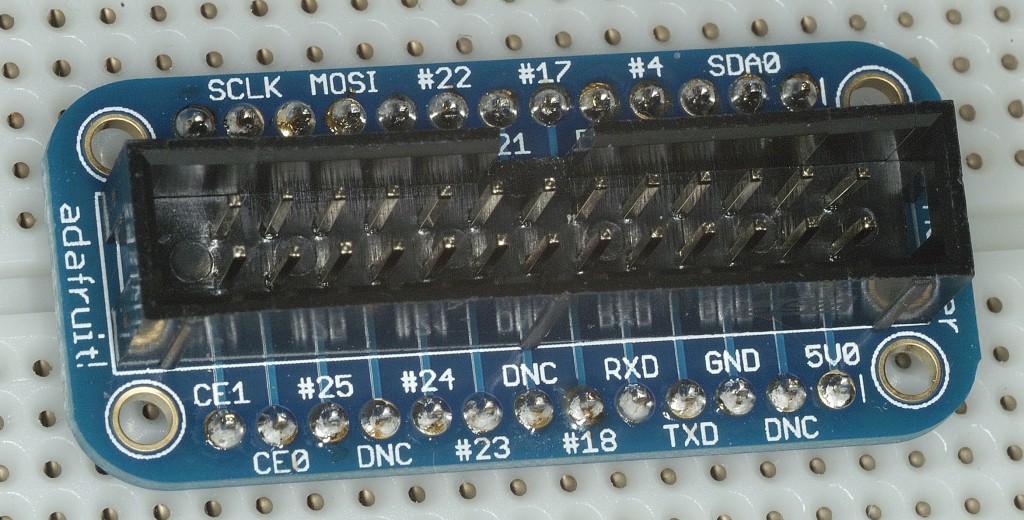
A Pi Cobbler is very important to use if you have a lot of connections to make. The Pi Cobbler that we used for this project is shown below.

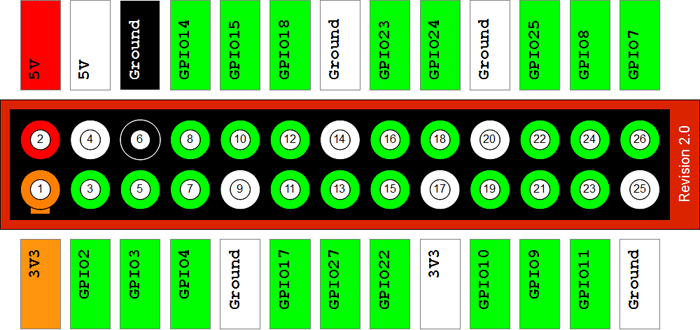
It is also necessary to follow the GPIO layout map, shown below, to make sure that you are using the correct pins and labels.
There are 5 pins that can be connected to the ground, 2 that can be connected to 5V and 14 pins that can be used as GPIO. A python code is used to reference pins by their labels. If something is labelled incorrectly then the code will produce many errors.
We had a hard time understanding how the GPIO pins worked, but the diagram (shown below) has helped us a lot.

